$Id: newug.wml,v 1.6 2001/02/07 10:29:44 cat Exp $
cat@gzigzag.org
This is the third version of Instructions for the Use of GZigZag, written by Katariina Ervasti, who is working with this document whenever she has time. (Documentation is only ONE of my tasks.)
Last update on 7th of February, 2001.
{#MYTOC#}
The purpose of this document is to explain how to use the current version of GZigZag (0.1.4).
If this is the first document you read about GZigZag, please read GZigZag - A Platform for Cybertext Experiments before continuing. The popularized article deals with the reasons for developing GZigZag as well as the main concepts and the advantages of the system. We assume that the reader of this document has read the article, especially the definitions of the main concepts, which will not be repeated here.
We are interested in describing the use of GZigZag as clearly as possible. Any comments on the content of this document are welcome and can be sent to cat@gzigzag.org.
And, since GZigZag is constantly being developed, also this document is always under construction. We are doing our best to inform users of the latest features of GZigZag!
At this stage of the development GZigZag can be used as an information manager. Using GZigZag as an information manager does not require any programming skills. Yet, if you want to build a specific view for a certain GZigZag structure, you need to know some Java.
The following structures (among others) have been made with GZigZag:
Naturally, we have build these structures just to test the functionality of the current version of GZigZag. In the future GZigZag will be a foundation for - as Ted Nelson expresses it - "a high-power personal and media system, with editing and presentation systems that expand the state of art".
If you're interested in visualizations of the future system, see Nelson's page dealing with Floating World.
You can download the recommended version of GZigZag for users on the Downloading GZigZag-page. The page also includes instructions for downloading and the commands needed for starting GZigZag.
In
We started making the structure by drawing our ideas on the paper.
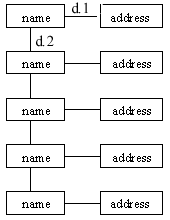
We planned the structure of the address book to be simple: it is a list of names and addresses. The names are listed along a dimension in alphabetical order. We decided to use d.2 for that purpose. The addresses are connected to the names along another dimension, and we chose d.1 for that. (Figure 1)
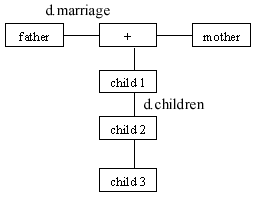
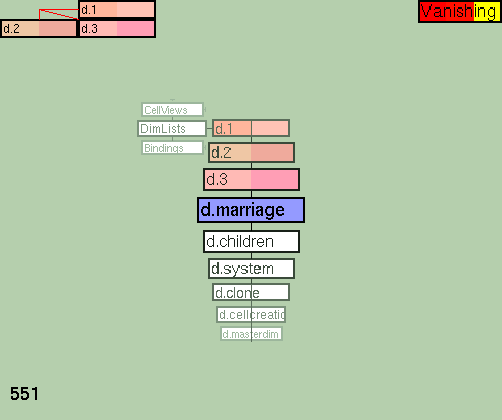
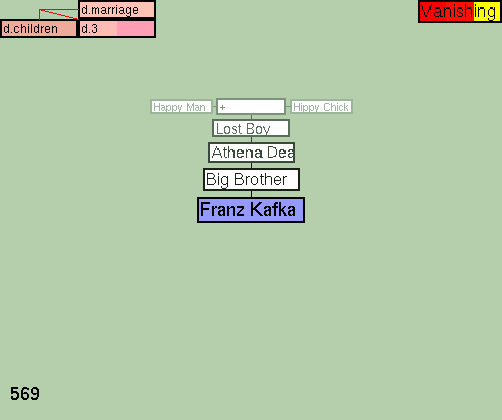
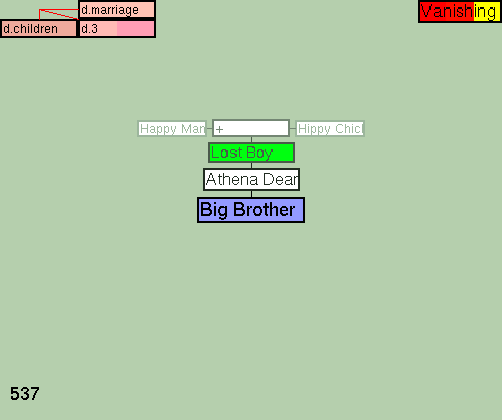
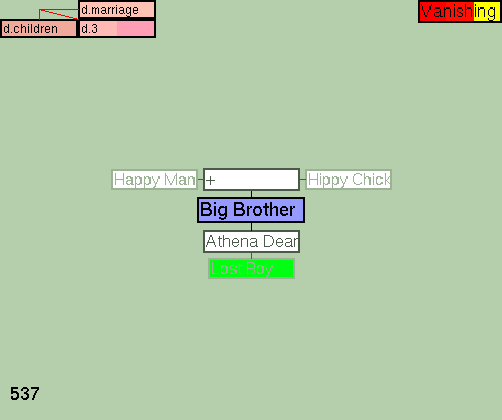
We didn't have to design the structure of the family tree from the beginning, since we decided to use Ted Nelson's design made for his Holm Family Demo. In this design siblings are connected along d.children, and married couples along d.marriage. An extra cell ("+") is used on d.marriage to make the structure symmetric, and the list of children from the marriage on d.children starts from that cell. (Figure 2)
Thus, designing a GZigZag structure is basically just thinking about the ways cells can be connected along dimensions. The most important thing to keep in mind is that on each dimension each cell has two ends, a negative end and a positive end, and on each dimension only one cell can be connected to one end. This means that on each dimension a cell can have at most two neighbours: a predecessor, which is connected on the negative end of the cell, and a successor, which is connected on the positive end of the cell.
If you want to use the same cell on the same dimension many times,
you can use a mechanism called cloning (which is explained in
).
Before you can start building a structure, you need some information
of how to move in the GZigZag space.
When you first start GZigZag, you see two windows showing the
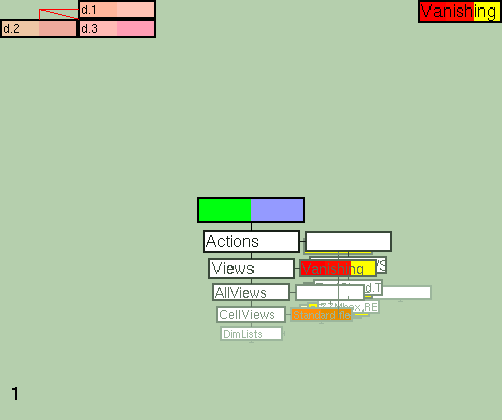
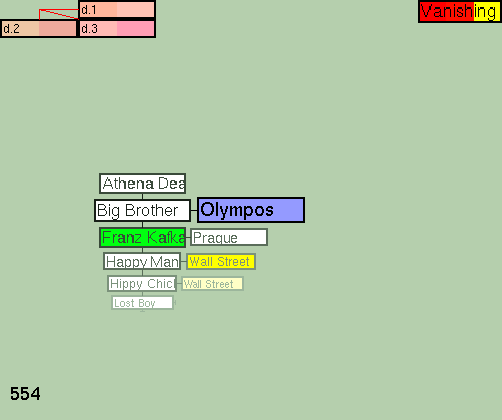
GZigZag structure. Figure 3 represents a
window showing the GZigZag structure after starting. As it can be
seen, in GZigZag cells are represented by rectangles and neighbours
along a dimension by a line.
The number of dimensions in GZigZag is infinite, but only three dimensions
(x, y, z) can be shown on the screen at the same time. The dimensions used
can be seen in the top left corners of both windows. If you look at these
corners, you'll see that the default dimensions are d.1 (on the X axis),
d.2 (on the Y axis) and d.3 (on the Z axis).
Now, there are two cursors you can use to move in the GZigZag space,
the left (green) and the right (blue) cursor. If you look at the uppermost cell,
which is called the homecell, you can see that the both cursors
are currently on the same cell.
The blue cursor defines the center of the right window. The speciality
of this cursor is that in addition to navigation, it can be used for manipulating data,
for example typing text in a cell . You can use the following keys to move the blue cursor:
As you press the buttons, you can see the cursor moving in both windows
and the center of the right window changing.
The green cursor defines the center of the left window. The speciality
of this cursor is that in addition to navigation, it can be used for excuting commands,
for example starting an applitude..
You can use the following keys to move the green cursor:
As you press the buttons, you can see the cursor moving in both windows
and the center of the left window changing.
If you look at the keyboard, you can see that the keys are arranged
in diamond patterns on the keyboard, one for the left and another for
the right hand use.
You can also use the arrow keys to move the blue cursor and both
green and the blue cursor can be moved by pointing a cell with
the cursor of the mouse and clicking at the button of the mouse. If
you use the mouse to point & click at a cell on the right window,
the blue cursor will move. If you use the mouse to point & click at
a cell on the left window, the green cursor will move.
If you get lost, press ESC to return to the home cell.
We started building the combination of the address book and the
family tree by building an address book. First, we created new cells
for the names of the relatives along d.2.
The key used for creating a new cell is
n. After pressing the n key, you have
to press one of the direction keys discussed above to
indicate to which direction the new cell is created. For example, to
create a new cell up from the blue cursor's location, press
n and i. To create a new cell up from the green
cursor's location, press n and e.
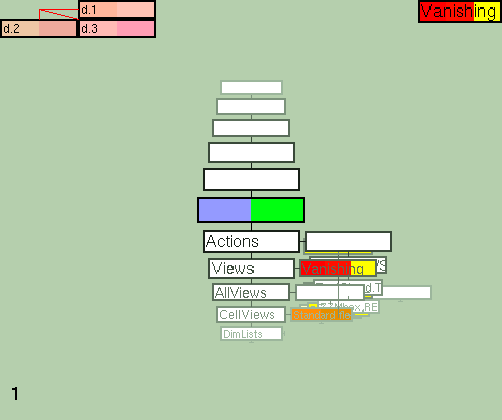
The new cells for the names of the relatives (Figure 4)
where created by pressing n and i five times, when the
blue cursor was on the home cell.
To type a name (or any other text) in a cell, you need the
blue cursor and the tab key. For example, to type the name of
your mother to the cell above the home cell, move the blue cursor on
the cell, press the tab key, type the name of your mother and then
press the tab key again. (The result of this operation can be seen
in Figure5.)
After typing the names of the relatives we wanted to add the
addresses to our address book. To add the addresses we created
new cells which were connected to the cells containing the names
along d.1. For example, to create a new cell for the address of your
mother, go to the cell containing the name of your mother and
press n and l. Figure 6
represents the example structure after adding a cell for the address
of the mother.
The addresses are added to the cells in the manner described
above. To add the address of your mother, move the blue cursor
on the cell ment for it, press the tab key, type the address
and then press the tab key again. Figure 7
shows the example structure after typing the address of the mother.
If you want to make typing text easier, you can use the Edit-
window. To get the edit window on the screen, move the green
cursor on the cell, which contains the text EDITVIEW and press
enter. To find the EDITVIEW cell go to the homecell (press ESC)
and move to the positive direction from the home cell on d.2 until you get
to the cell containing the text 'Actions'. When you move to the
one step to the positive direction on d.1 from this cell you
end up in the Actions list, to which the 'EDITVIEW'-cell is connected.
If you want to use a cell on the same dimension
many times, a mechanism called cloning is needed.
If you want to clone a cell, on which the green cursor is, press
Shift-t and one of buttons indicating a
direction (in which you want to place the clone). If you want
to clone a cell, on which the blue cursor is, press 't' and one of
the buttons indicating a direction (in which you want to place the
clone).
For example, if your mother and father have the same address, you
might want to make a clone of the address cell. You could do this for
example by moving the blue cursor on the address cell and the green
cursor on the cell containing the name of your father. After doing
this, you would press t and f. The result of
these functions can be seen in Figure
8. Notice that the colour of a cloned cell is light yellow and the
colour of a clone is dark yellow.
The advantage of cloning is that it makes updating easy. When
you update one of the cells containing the same information,
the change can be seen everywhere. For example, if you
change the text on either the cloned cell or the clone containing
the address of your parents, the changes can be seen in both
cells.
After finishing the address book, we started building the
family tree.
Now, two new dimensions are needed for the family tree:
d.children for connecting the siblings and d.marriage for
connecting the married couples. (When you're making new
dimensions any name will do, but we are used to naming
the dimensions d.something.)
To add new dimensions, move to the positive direction from the home cell
along d.2 until you get to the cell containing the text 'DimLists'. When
you move one step to the positive direction along d.1 from this cell you
end up in the dimension list. The dimension list contains a cell for each
dimension, which are connected to each other in a cyclical manner.
The dimesions that are currently used (d.1, d.2 and d.3) are pink.
Making a new dimension simply means adding a new cell on a
dimension list and typing the name of the dimension in the
cell. Figure 9 shows the
dimension list after adding d.marriage and d.children.
Before we can continue our study of making the family tree,
rotating the dimensions has to be explained. The number of dimensions
in GZigZag is infinite, but only three dimensions can be shown on
the screen at the same time. This is why knowing how to rotate
dimensions is necessary.
The following keys are used for rotating the dimensions in the right
window:
The following keys are used for rotating the dimensions in the left
window:
For example, to rotate the d.marriage dimension to the X axis of the
right window, press x until you can see the text d.marriage in the top
left corner of the window. Figure 10 shows
the right window after rotating d.marriage to the X axis.
Before explaining how the cells containing the names of the relatives
were connected along d.marriage and d.children, you have to understand
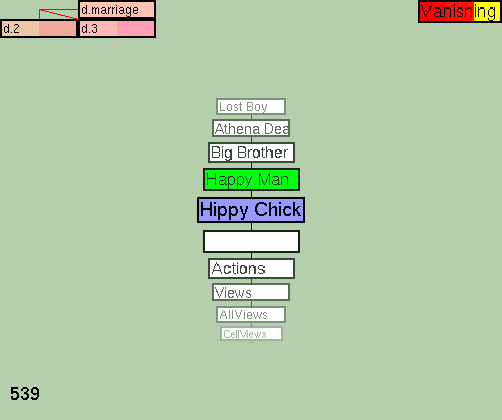
how to choose the cells you want to connect. In
the GZigZag language this is called marking.
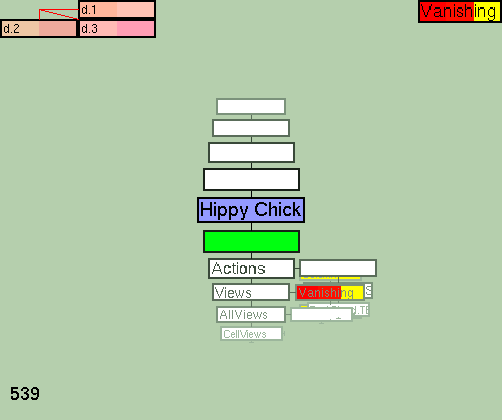
To mark a cell, move the blue cursor on the cell you want to
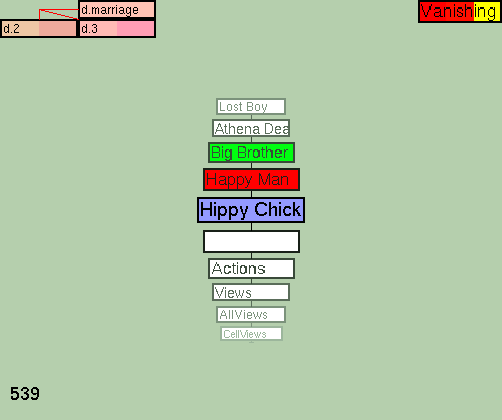
mark and press m. The cell that you have marked is
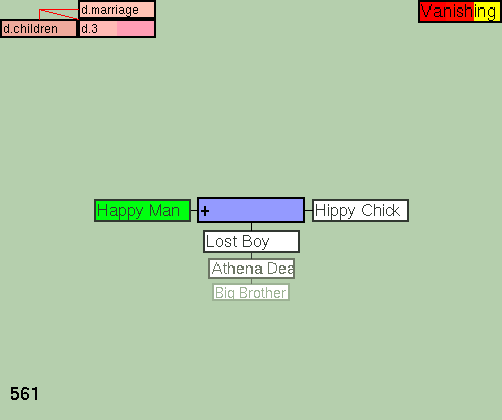
now coloured red. Figure 11 shows
the example structure after marking Hippy Chick.
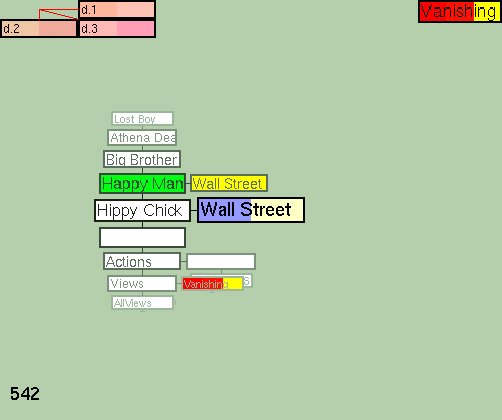
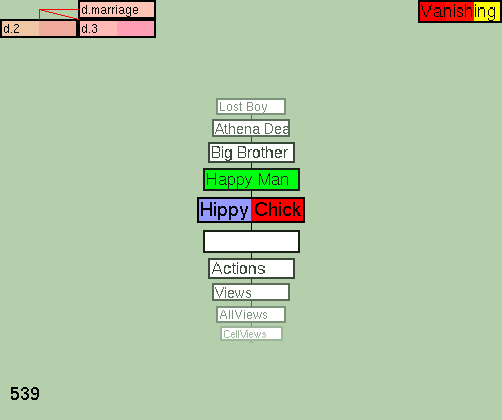
Many cells can be marked at the same time. To mark another cell, move
the blue cursor on the cell you want to mark and press m.
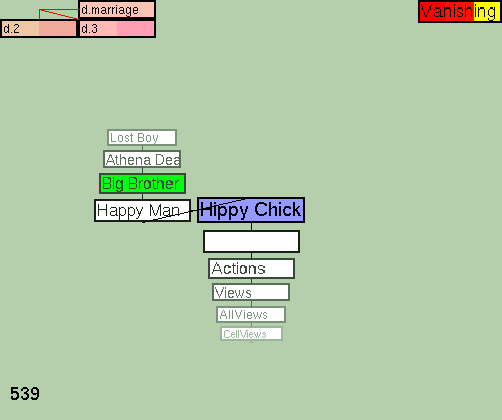
You can now see two red cells. Figure
12 shows the example structure after marking Hippy Chick and
Happy Man.
To unmark a cell, move the blue cursor on the cell you want to
unmark and press m.
If you want to connect two cells to each other, mark one
cell and point the other one with the blue cursor. (If you mark both
cells, they will be connected into a loop.)
If you want to connect three cells, mark two cells and point
the third one with the blue cursor. (If you mark all cells, they will be
connected into a loop.)
After choosing the cells (in the manner explained
above), all you need to know is the key binding for connecting the
cells. So, to connected the chosen cells, press the
- and then a key indicating a direction of the
connection.
Connecting cells requires a lot of practice. If you make a mistake,
you can use the u-key ('undo') to delete the latest connection.
Next we explain how the cells of the family members used in
the address book can be connected to the family tree structure.
The same result can be achieved in various ways. The method
of connecting cells explained here is just an example.
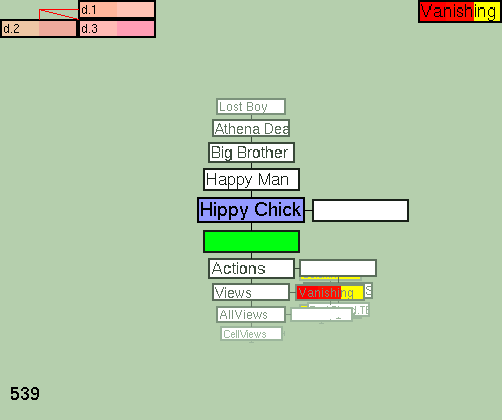
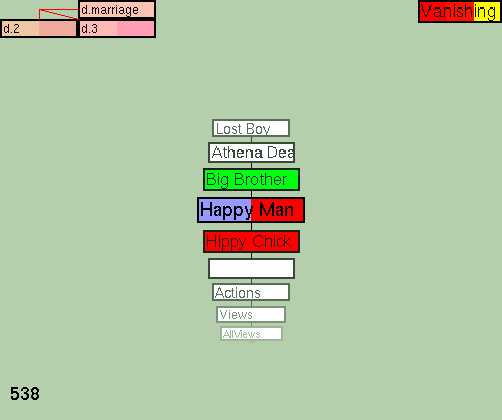
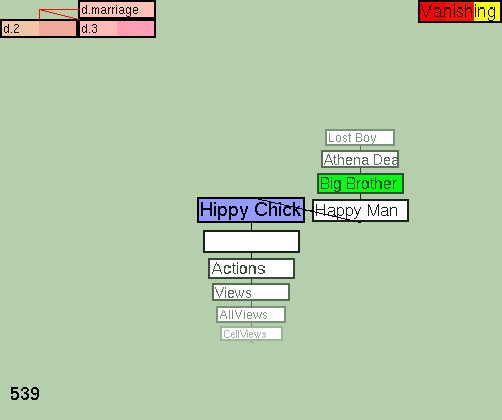
First, we rotated d.marriage to the X axis to connect the married
couple. Then, Happy Man was marked and the blue cursor was moved on
Hippy Chick. (Figure 13.)
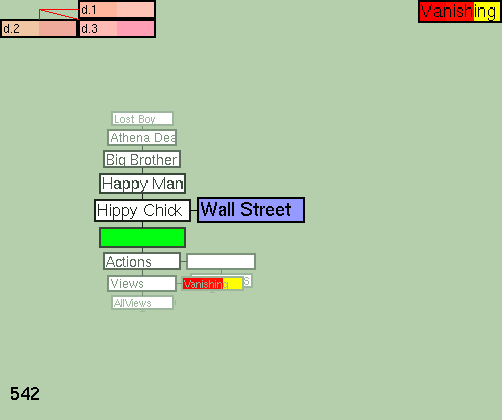
The key needed for connecting the cells is -. After
pressing the --key one of the direction keys has to be
pressed to indicate the direction in which the cells are connected. In
our example the connection, which can be seen in Figure 14, was made by pressing
- and j.
If - and l had been pressed the result would
have been the connection seen in Figure
15. Since in the family tree design the 'dad' cell (Happy Man)
is on the left and the 'mum' cell (Hippy Chick) on the right, this
is not the connection we want.
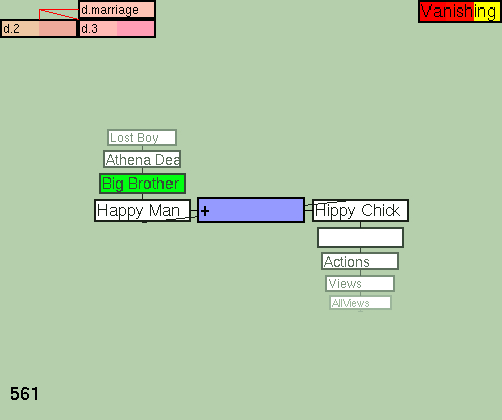
After this we added an extra cell (+) between Happy Man and
Hippy Chick to indicate that they are married. ( Figure 16)
Then we wanted to connect the extra cell to the children of the couple
along d.children To do this, we rotated d.children to the Z axis. (We
kept d.marriage on the X axis and d.2 on the Y axis.) We marked Lost
Boy, Athena Dean and Big Brother and moved the blue cursor to
+. ( Figure 17)
We pressed - and k which indicates that the cells
should be connected to the positive direction along d.children,
which was on the Z axis.
Finally, to view the family tree we rotated d.marriage to the X axis,
d.children to the Y axis and d.3 to the Z axis. The final result can
be seen in Figure 18.
One of the advantages of having two windows is that the left and
the right window can show different dimensions of the same GZigZag
space. The same cells used in the family tree can be viewed in the
address book in another window.
There are several different visualizations (views) of the
GZigZag structure. The name of the active view
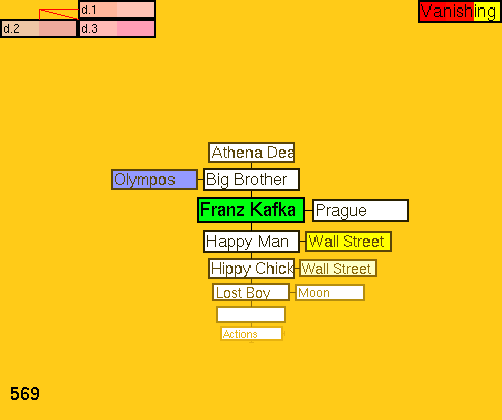
can be seen in the top right corner of a window. All the
figures used in this guide so far show the address book and the
family tree using the vanishing view.
You can change the view of the right window by pressing the
v and the view of the left window by pressing
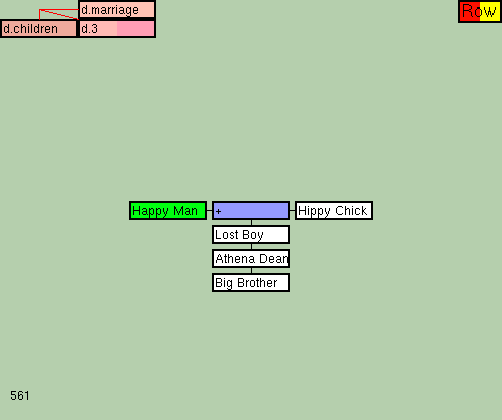
shift-v. Figure 19 shows
the family tree in the row view.
As you keep pressing v (or shift-view), you notice that
the current version of GZigZag shows four views: the vanishing
view, the strecth vanishing view, the row view and the column
view.
Yet, these are not the only views available. The views that are used
when the user presses v or shift-v are listed in
the Views list, which can be found by moving to the positive direction
from the home cell along d.2 until getting to the cell containing the
text 'Views'. If you move one step to the positive direction on d.1
from this cell, you are in the Views list.
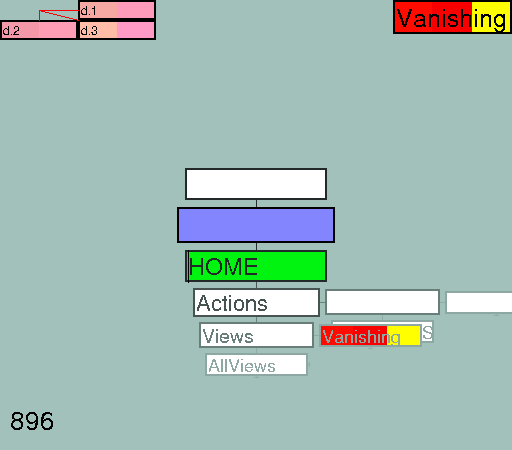
To see a listing of all views, go to the cell containing
the text 'AllViews' (that is connected to the 'Views'-cell on d.2).
The list of all views is connected to this cell along d.1.
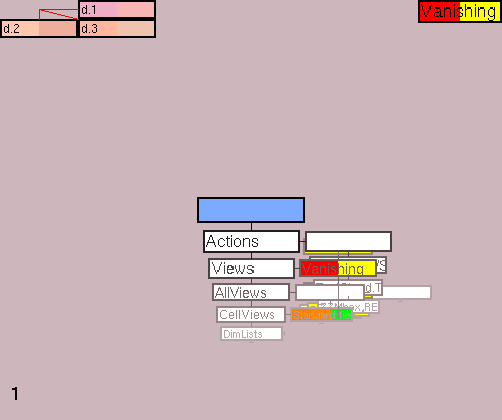
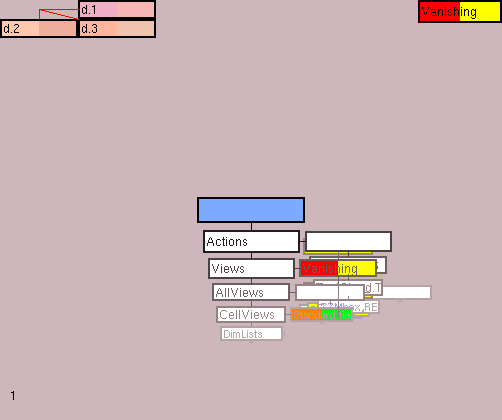
If you want to use one of the views listed in the 'AllViews'
list, clone the cell of the view you want to use to the Views
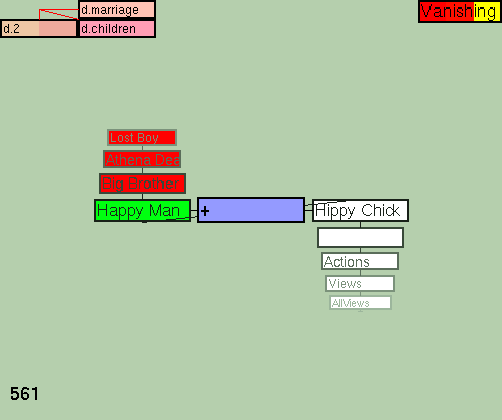
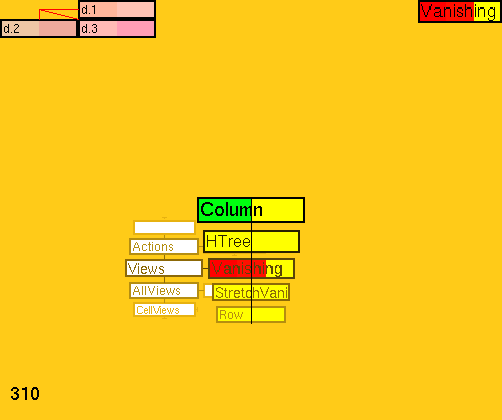
list. Figure20 shows the AllViews list after
cloning HTree. The HTree view can now be used by pressing
v (or SHIFT-v).
Most of the views of the 'AllViews' list are designed for specific
purposes. Section deals with views in more detail.
When you are making a structure of your own, you may sometimes make
mistakes or want to change the structure afterwards. The current
version of GZigZag offers some possibilities for this.
Undo (=cancelling the last move(s)) was already briefly mentioned before. The
u-key, for example, removes the last
move of the cursor, the last connection made, the last hop,
alpha-shear or cell exchange. (The last three are explained later in
this document.) It also brings back a deleted cell.
If you notice that you have connected the cells in a wrong way and are
no longer able to use undo to break the connection, you can
use use the b-key and one of the direction keys
(indicating the direction of the connection you want to remove).
For example, when making the family tree structure you may notice that
you have connected your cousin along d.children as if he was your
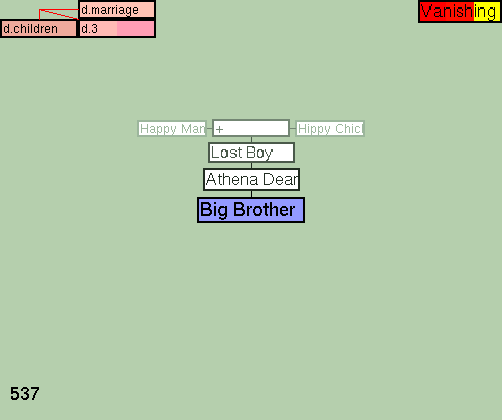
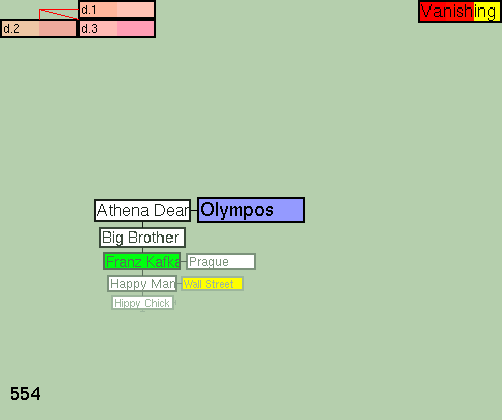
brother. In Figure21 Franz Kafka
is the cousin in the wrong place. Franz Kafka can be removed by
pressing b and , (when the blue cursor is on
Big Brother). The result of this can be seen in Figure 22.
If a cell is used on many dimensions, the other connections
still remain after breaking a connection on one dimension. In
the example given above the cell of the cousin maintains its
place in the address book.
If you have created a useless cell, you can delete it. To do this,
move the blue cursor on the useless cell and press delete .
Don't delete a cell on which the green cursor is! If you
do that, you'll get a 'RASTER ERROR'.
When building a GZigZag structure you notice quite often that you
have a useful cell, but it is in the wrong place in the structure.
Hopping is an operation that - as the name indicates - makes a cell
hop over one of its neighbours along a chosen dimension.
For example, if you have arranged the names in your address book
in alphabetical order and notice that one of the names is in
the wrong place, you can move it to the right place by using the
hopping function.
The key used for hopping is h after which you have
to press one of the direction keys to indicate the direction
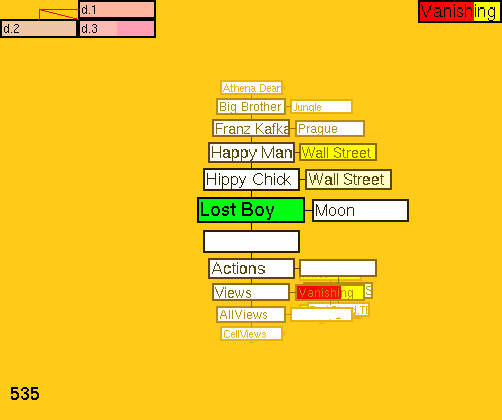
of the hop. In Figure 23 Lost Boy is in the
wrong place. Lost Boy can be moved to the right place by moving the
blue (or) the green cursor on Lost Boy and then pressing
h and a direction key. We moved Lost Boy by moving the
green cursor on it and pressing the h and c five
times. The result of this is shown in Figure24.
Another operation that can be useful when you want to move a cell in
the GZigZag structure is the alpha-shear. The hop makes a cell hop
along a dimension, but the alpha-shear moves the connection.
The alpha-shear is used by typing a and two
directions: first the direction of the connection that is moved and
then the direction into which the connection is moved.
The difference between the hop function and the alpha-shear function
is easier to understand with an example. So, for example, when
making the address book you notice that you have connected the address
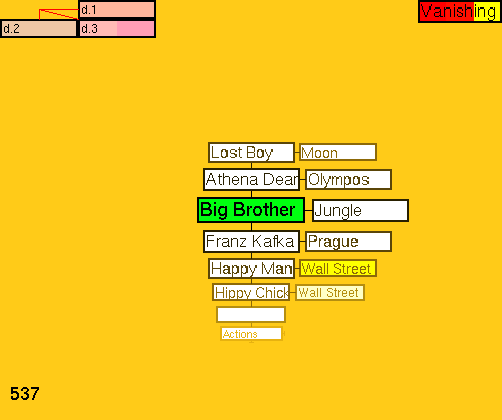
of your sister to the address of your brother. In Figure 25
Olympos is the address of Athena Dean, not the address of Big
Brother.
You can't correct this mistake by hopping because the hop function
only hops the address to the other side of Big Brother on d.1.
(Figure 26.) So, you can only correct the
mistake by using the alpha-share. We pressed a,
j and i to move Olympos to the right
place. (Figure 27 represents the result of
this.)
Cell exchange is an operation that changes the location of two cells
in the GZigZag structure. First, two cells are selected using
the blue and the green cursor. After this % is
pressed.
For example, the family tree structure is designed so that the cells
of the children are connected to + cell along d.children from
the oldest to the youngest. If you had connected the cells so that the
oldest would be the last cell of the list and the youngest would be
the cell just below +, you could change the cells to the
right places usig the cell exchange.
Figure 28 shows Big Brother, who is
naturally the oldest of the children, and Lost Boy, the youngest of
the children, in the wrong places. To correct the mistake, the blue cursor
was moved on Big Brother and the green cursor was moved on Lost
Boy and then % was pressed. Figure29 shows that the brothers are now in the
right places in the family tree.
The basics of navigation in the GZigZag space were introduced in
Section . When you are familiar with the
basics, these tricks might help you to work more effectively with your
GZigZag.
Currently there are two keys that help you to return to the home cell, if
you feel completely lost:
Cells of GZigZag have an ID, the purpose of which is to help
to recognize the cells. In the current version of GZigZag IDs are
numbers and can be used to make navigation easier.
The ID of the cell, on which the cursor is, can be seen in the
bottom left corner of a window. The right window shows the ID
of a cell on which the blue cursor is. The left window shows the
ID of a cell on which the green cursor is.
The IDs can be used to help navigation in the following way:
If you notice that you have lost one of the cursors, this
function might be useful. It brings the lost cursor to the
cell on which another cursor is.
To make the blue cursor jump to the cell on which the green
cursor is, press >.
To make the green cursor jump to the cell on which
the blue cursor is, press <.
If you are on a cloned cell (the colour of which is dark yellow) and
want to find out were the original cell (from which the clone was made)
is, choose one of the following depending on which cursor you want to move:
A rank is one of the terms of the GZigZag language. It simply
means a set of cells connected to each other along a dimension.
For example, Figure 30 shows an incomplete
address book, in which Happy Man and Wall Street form a rank
along d.1. Also Hippy Chick and Wall Street form a rank along
d.1 as well as the cells connected along d.2 from Lost Boy to Bindings
(which cannot be seen on the figure).
To get to the end of a rank, press END and one of the keys indicating
a direction. For example, if you would like to move the green cursor
from Happy Man to Lost Boy (see Figure 30),
you would have to press END and e.
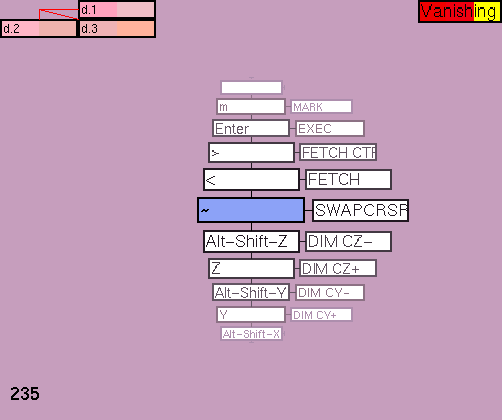
Sometimes you might want to change the places of the cursors.
If you have an American keyboard, press ~ for doing this.
In case you are not using an American keyboard pressing ~
does not work. If you want to use the function, change the
keydinging. (See for changing the keybinding.)
The current version of GZigZag offers some possibilities for changing
the user interface. You can change the key bindings and the way cells
(and their contents) look like. The looks of the views can also be
modified.
In addition to modifying the bindings of the basic functions, you can modify
the bindings of the Edit window and the bindings used for curseling.
To modify the bindings, go to the 'Bindings' list. You find the list by
moving to the positive direction on d.2 from the homecell until you get
to Bindings. This cell is connected to Normal mode,
Text edit mode and Cursel mode on d.1, which are
connected to cells enabling the change on d.2.
Say you want to change the key used for changing the places of the
cursors. Instead of ~ you want to use F10.
You move on the Normal mode list on d.2 until you find a cell containing '~'.
(Figure31.) Just replace ~ with F10. (Figure32.)
Pressing F10 should now change the places of the cursors.
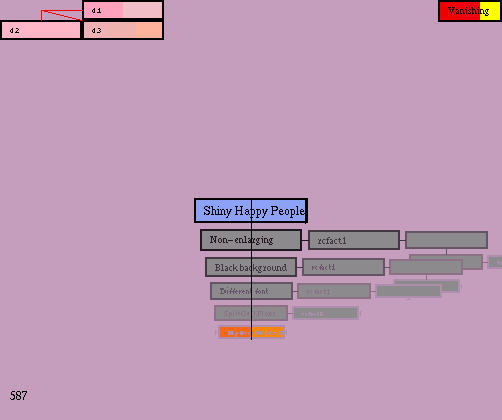
A cell view determines what cells and their contents look like.
By using a cell view you can affect
As you have learned earlier, you can change a view by pressing a
certain key. The same principle works with the cell views. A cell
view of the right window can be changed by pressing F2
and the cell view of the left window can be changed by pressing
SHIFT-F2.
The current version of GZigZag does not show the name of
the active cell view on the window the same way the name of the active
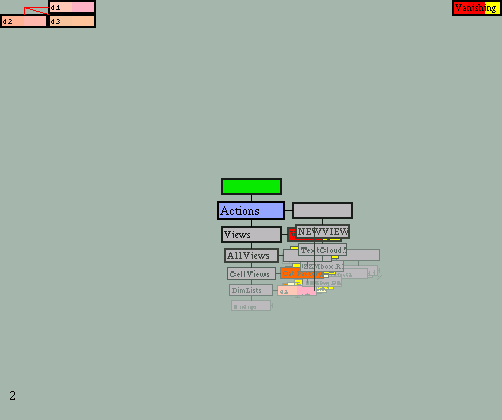
view is shown. The cell view that you get after starting an empty
space in your GZigZag is shown in Figure32.
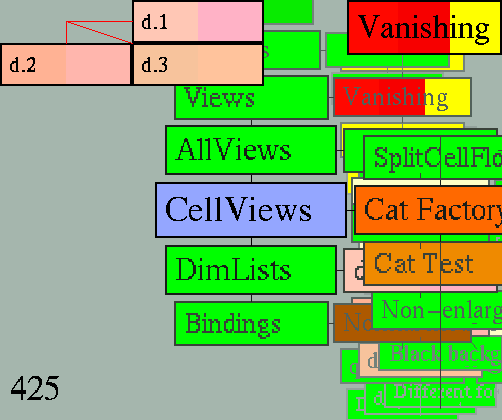
After pressing F2 once, you get a cell view that can be seen in
Figure33.
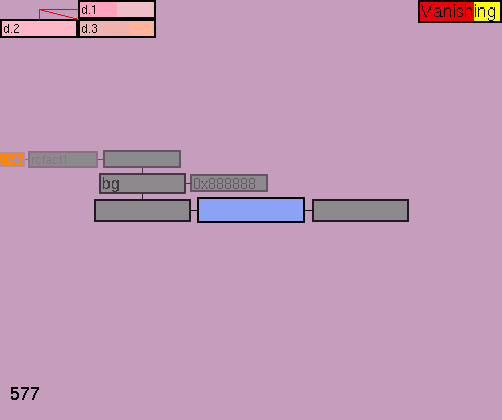
Naturally, you can modify cell views and create a cell views of
your own, e.g. a cell view for a bad rainy day with boring grey background colour
and small font size (Figure34) and a cell view for a wonderful lovely day with
green background, big font size and huge margins (Figure35).
Before you can start modifying a cell view, you have to find the
'CellViews' list.
You can find the list by moving to the positive direction on d.2 from
the homecell until you get to the cell containing the text "CellViews".
After this, move one step to the positive direction on d.1. You should
now be on the 'CellViews' list, which consists of cells containg the names
of the cell views.
If you move on the list, you notice that the current version of GZigZag
contains five standard views: "Standard Flob Factory" (which is used when
you start GZigZag, see Figure32), "Non-enlarging"
(see Figure33), "Black background", "Different font" and
"SplitCellFlobs". These standard cell views just demonstrate the different possibilities
and can be easily changed.
(If you take a closer look at the list, you notice that some of the cells
are coloured orange. The orange colour tells that the coloured views
are currently used in the two windows. Since the current version of GZigZag
does not show the name of the active cell view in the windows, this is the
only way to find out what is the name of the cell view used.)
Say, you want to modify the "Standard Flob Factory". Firstly, you want to
change the name of the view to "My Grey Winter Day Standard Factory" ;-).
Then, you want to change the background colour of the cells to grey,
the font type to 'Serif' and the size of the font to '8'.
Changing the name of a cell view is quite easy. Just go to the
cell containing the text "Standard Flob Factory" and change the text
to "My Grey Winter Day Standard Factory". (If you don't remember
how to edit text in a cell, see )
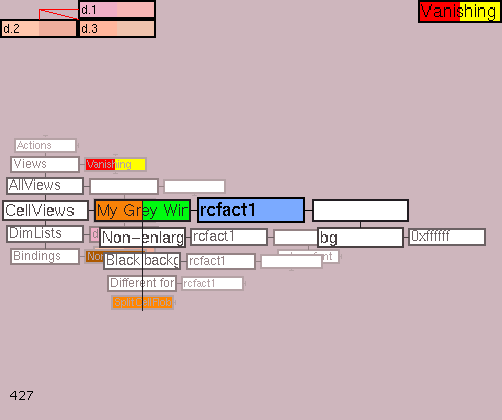
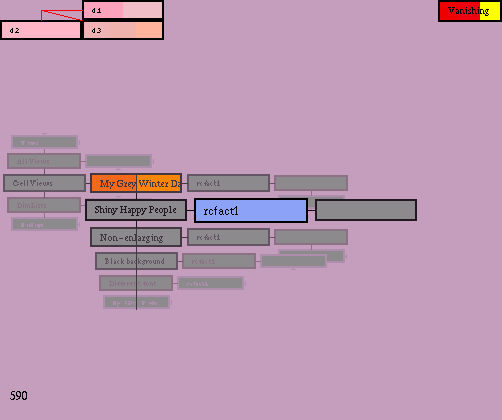
The state of art of "My Grey Winter Day Standard Factory" after the change of
the name can be seen in Figure36.
In Figure36 the blue cursor is on a cell containing the text "rcfact1", which
is an identifier cell of the programme. Every cell on the 'CellViews' list is
connected to an identifier cell like this on d.1. A user should not try
to modify this cell.
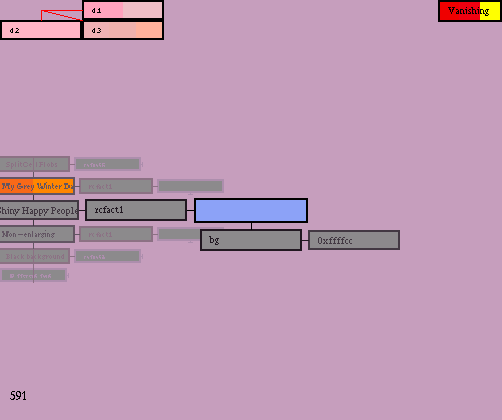
Figure36 also shows that the cell following "rcfact1" on d.1 is connected to a
cell including the text "bg" on d.2. The "bg" cell, then, is connected to a
cell containing the text "0xffffff" on d.1.
The roles of these cell are as follows:
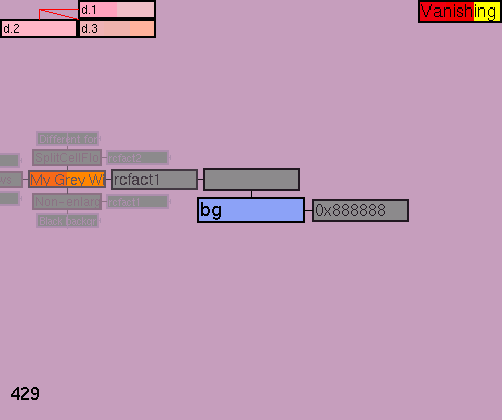
So, to change the background colour from white to grey, pick a shade
of grey from a RGB Hex Colour Chart
and replace "fffff" with an approriate value.
For example, if you replace "ffffff" with "888888", the result can be seen in
Figure37.
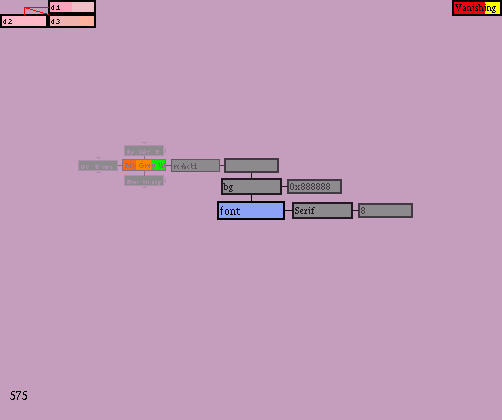
Now you would like to change the font type and size of "My Grey Winter Day Standard
Factory", but there is a problem. If you look at Figure37, there are no cells for placing the
values of font type and size . The problem can be easily solved: just create new cells for the
parameter and values. Figure39 shows our example after adding the cells
for the font parameter and the values of the type and the size.
The next thing you have to do in order to change the font type and size is to type in the
values and the parameter. In the current version of GZigZag, you have to start by
typing the values . (Yes, it is rather complicated, but if you type the parameter first,
you will get an error. This will be fixed in the future.) So, type "8" (or any other value for
the font size) in the tailcell of the newly created rank, "serif " (or any other value for the font type)
in the middle cell and the text "font" in the headcell of the rank. The example after these
changes can be seen in Figure40.
The background colour and the font type and size are not the only modifications you can
make. This section introduces other possible modifications.
If there are no cells needed for making certain modifications, you have to create the
cells (in the manner introduced in ).
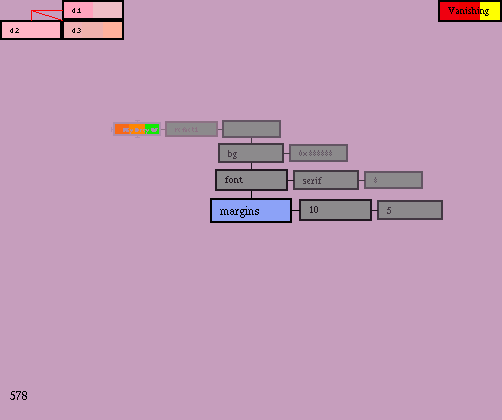
Margins add invisible space inside the border of the cells, which pushes the cell's contents away
from the border on all four sides.
The following cells (created respectively along d.1) are needed for modifying margins:
Figure41 shows "My Grey Winter Day Standard Factory" after
adding the cells for the "margins" parameter and the values.
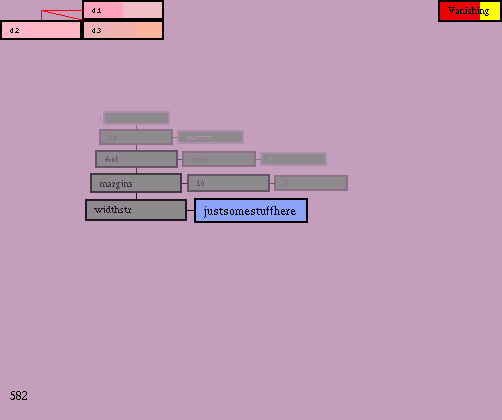
You can change the width of the cells using the "widthstr" parameter.
(As you have probably noticed, the StrechVanishing is the only view
that specifies the width of the cells according to the lenght of the text
in each cell. In other views, the cells have the same width.)
The following cells (created respectively along d.1) are needed for modifying
the width of the cells:
Figure42 shows "My Grey Winter Day Standard Factory" after adding the cells
for the "widthstr" parameter and the values.
You can affect the way the fonts are displayed on the screen by
using the "enlargefont" parameter.
If the "enlargefont" parameter is "true", GZigZag can use bigger
font size than specified in the font parameter to highlight the center cell
in certain views. Setting "enlargefont" to false means that the specified
font size is used everywhere.
The following cells (created respectively along d.1) are needed when using these parameters:
You can also - instead of modifying an existing cell view - make a completely
new cell view.
To do this, first create a new cell on the 'CellViews'-list and type the name of
the cell view in it. (Figure43 shows a new cell (named after a song of R.E.M)
in the 'CellViews' list.) Then continue by creating an identifier cell containing
the text "rcfact1" and an empty cell, respectively, to the positive direction
along d.1. (Figure44.) After this you can start creating the cells for
the parametres on d.2. (Figure45)
This section introduces some of the views listed in the 'AllViews'-list.
As it was mentioned in , you have to clone the cells of these
views from the 'AllViews'-list to the 'Views'-list in order to
use them.
VTree, VTree with lines, HTree and HTree with lines are views
designed for showing tree structures and other hierarchies.
VTree is an abbreviation for 'vertical tree', HTree for 'horizontal
tree'. VTree shows the tree vertically, HTree horizontally.
The difference between the VTree and VTree with lines is -as
the name indicates - that VTree shows lines between the element
of the hierarchy. Naturally, the same applies to the difference
between HTree and HTree with lines.
Say, you would like to present the organizational chart of the
Finnish National Road Administarion
using VTree with lines.
(The instructions given here also apply to VTree. The reason for using
VTree with lines in this example is that the writer of the instructions just
happens to like VTree with lines more.)
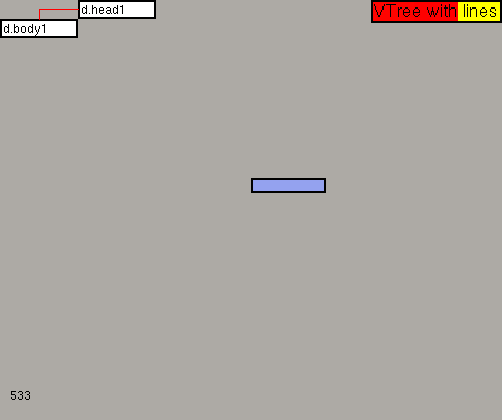
First, you create two new dimensions. You could call the dimensions
for example d.head1 and d.body1. After doing this rotate d.head1 to the
X axis and d.body1 to the Y axis. Then, change the view to
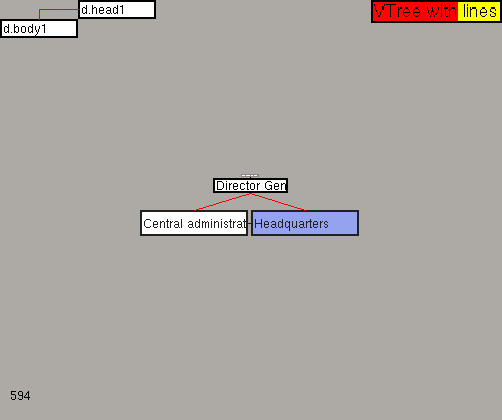
VTree with lines. Figure45 shows a GZigZag
window after these operations.
The board is the highest organizational unit of the hieararchy, so type
'Board' on the cell. Below the board is the director general. Create a
new cell for the director general by pressing 'n' and ',' (when the
right cursor in on that cell) and type 'Director General' on the cell.
Below the director are two units: the central administration and
the headquarters. Create a cell for the the central administration first
by pressing n and , (when the right cursor is on that cell).
Another subunit to the director general can be created by pressing
n and l (when the right cursor is on that cell).
Figure46 shows
the hierachy after these operations (and typing in the names of
the organizational units.)
Thus, when you are using the blue cursor, you can create a subcell for another
cell of the hierarchy by pressing n and ,. If a cell has more than
one subcells, you can create more subcells from the first subcell by
pressing n and l.
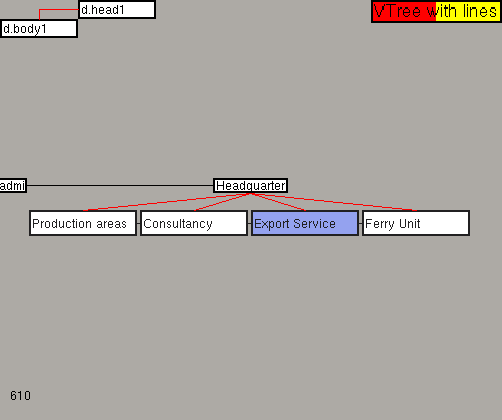
Figure47 shows one part of the organizational chart of the Finnish National
Road Administration after adding more organizational units.
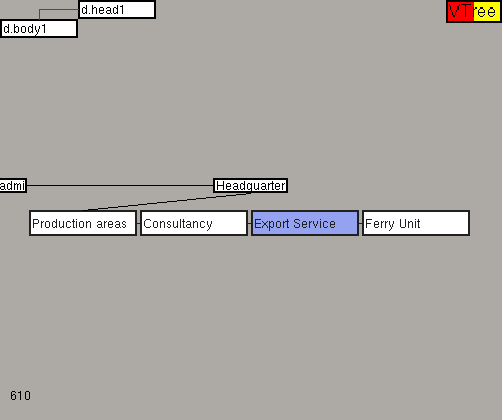
After creating the organizational chart using the VTree with lines you
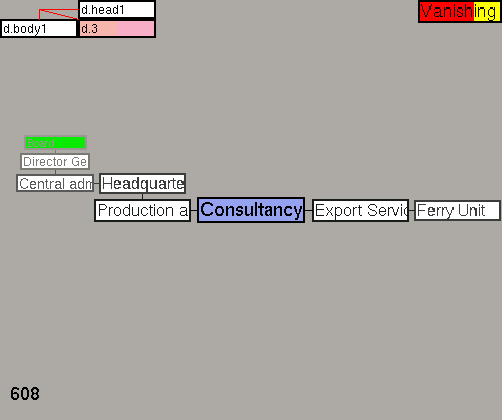
can view it with VTree (Figure48) and other views. Notice that the organizational
chart looks quite different in views which are not designed for
hiearchical structures. (Figure49 presents the organizational chart in
Vanishing View.)
If you want to view a tree made using VTree, all you have to do
is to change the two dimensions to different axes.
Thus, to view the previous example using HTree or
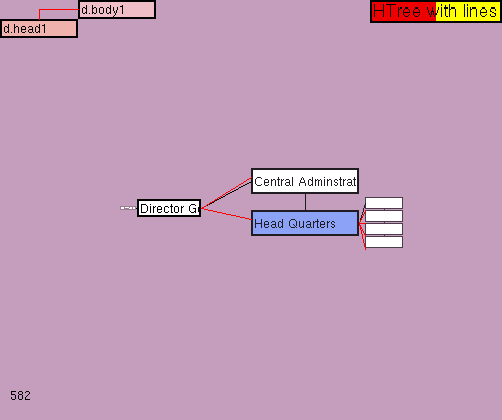
HTree with lines, you'd have to change d.head1 to the Y axis
and d.body1 to the X axis. (Figure50)
In this view you can create a subcell for cell by pressing n and l.
If a cell has more than one subcells, you can create more subcells from
the first subcell by pressing n and , .
If you are planning to give a presentation, you could try doing it with
GZigZag. There is a specific view called Presentation view designed
especially for this purpose. (If your version of GZigZag does not
have a cell for the Presentation view on the 'AllViews' list, make a
new cell on the list and type 'Presentation' in it (with out '- marks). After doing this make
a new cell to the positive direction from this cell on d.1 and type' Prez.R'
in it.)
Presentation view shows the structure of your presentation
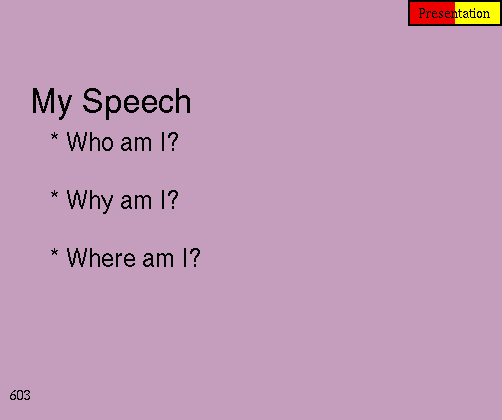
as a list. Figure51 shows a presentation called
'My Speech'. The most important parts of 'My Speech' are
'Who am I?', 'Why am I?' and 'Where am I?'.
In the example the blue cursor is used to move in the presentation.
The regular keys ' i , l , , and j are used for moving the blue
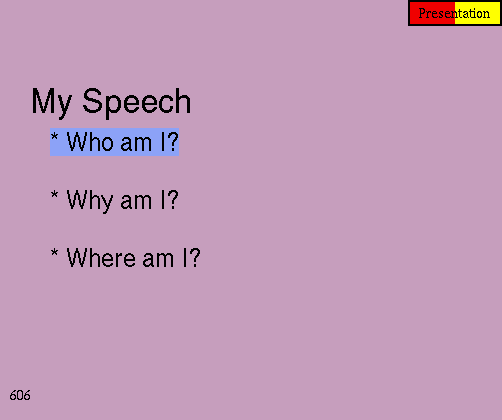
cursor. Pressing , moves the blue cursor down on
the list (Figure52). When the blue cursor is on 'Who am I?', pressing
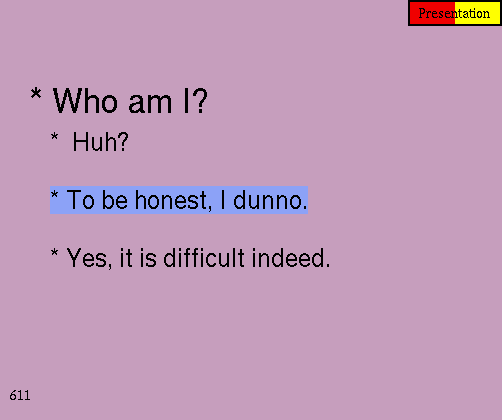
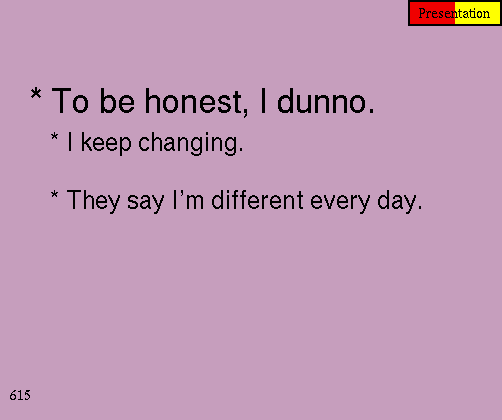
l takes you the 'Who am I?' part of the presentation (Figure53).
When the blue cursor is on 'To be honest, I dunno', pressing l
takes you to the 'To be honest, I dunno' part of the presentation
(Figure54). You can get back to the previous parts of the presentation
by pressing i .
After you have learned how to read a presentation using
Presentation view, you might want to take a look at the same
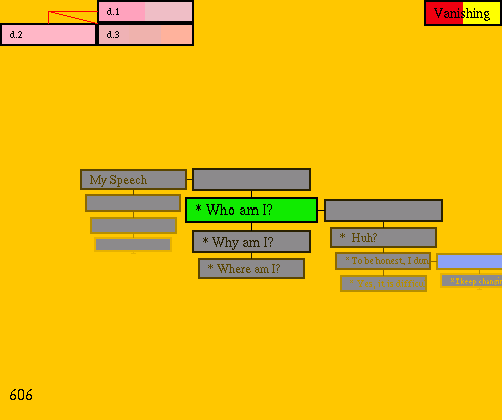
structure using another view. Figure55 shows
the presentation in Vanishing View. If you want to make a presentation of your own, you should
understand the structure of the presentation shown in Figure55. (The writer
of this guide thinks that a presentation is actually easier to make using
Vanishing View than Presentation view, which is just designed
for showing presentations.)
If you look at the Figure55, you notice that title of the presentation
('My Speech') is placed in one cell. The positive end of this cell
is connected to an empty cell on d.1. The most important parts
of the presentation ('Who am I?', 'Why am I?' and 'Where am I?')
are also in their own cells, which are connected to each other on
d.2. 'Who am I?', then, is a title of a another part of presentation,
which consists of 'Huh?', 'To be honest, I dunno' and 'Yes, it's difficult
indeed'. Thus, 'Who am I?' is followed by an empty cell on d.1 and
'Huh?', 'To be honest, I dunno' and 'Yes, it's difficult indeed' are connected
to the empty cell on d.2.
Do you understand the structure of a presentation now? ;-) To sum up,
a cell contain the title of a presentation (or a title of a certain part
of a presentation) is always connected to an empty cell to the positive
direction on d.1. The parts of the presentation (or the parts of a certain
part of the presentation ;-) are connected to the empty cell to the
positive direction on d.2. If you understand that you should be able
to make your own presentation with GZigZag.
We appriciate people who have time to test Nile and comment on it
e.g on the developer's mailing list, but we would like to remind that
this tool is NOT yet safe. So don't try writing anything
precious with it.
Before you can start using Nile, you should make some empty cells.
You can think of these empty cells e.g. as cells that will rescue you if you
get RASTER ERROR while using Nile. :-) (See .) You can for example
make two empty cells above the home cell. Leave the blue cursor on
one of the cells. (See Figure56.)
After doing this, find the cell including the text 'SplitNileDemo' on
the 'Actions'-list using the green cursor. This cell can be found by going
to the homecell (press ESC unless you are already on the homecell) and
move to the positive direction from the home cell on d.2 until you get
to the cell containing the text 'Actions'. When you move one
step to the positive direction on d.1 from this cell you'll end up in the
Actions list, to which the 'SplitNileDemo'-cell is connected.
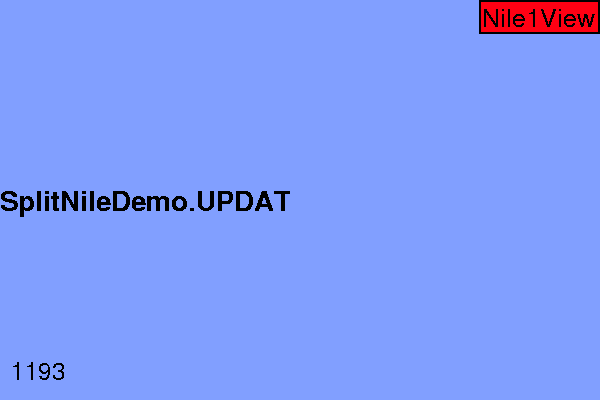
Once you have found the right cell, press ENTER. Now you should see
the Nile window (Figure57) appearing on the screen.
Then move the green cursor (on the GZZ window) on the other new
cell you have just created.
Click on the left or the right side of the Nile window depending on which
side of the window you want to start writing. Write a title for your text.
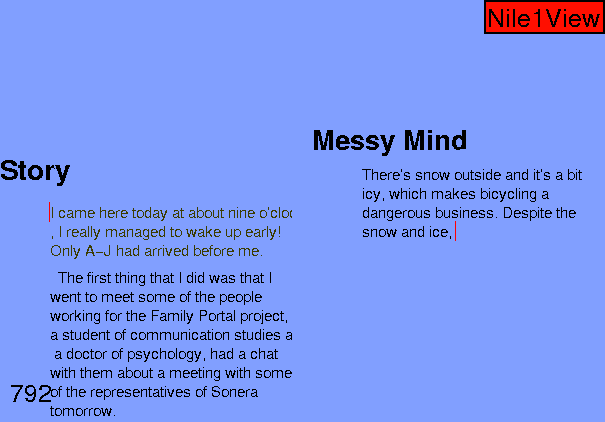
Figure58 shows the Nile window after clicking
on the right side of the window and typing 'Story'.
Now that you have written a title, press enter to start writing the
actual text. You do not need to capitalize the first letter of the
the sentence if you remember to press the SPACEBAR two times
after ending the previous sentence. Nevertheless, if the first word of the
sentence is a name, you should capitalize the first letter. If you later want
to move the name word e.g. in the middle of the sentence, the first letter of the name
won't be a capitalized one anymore. To start a new paragraph, press
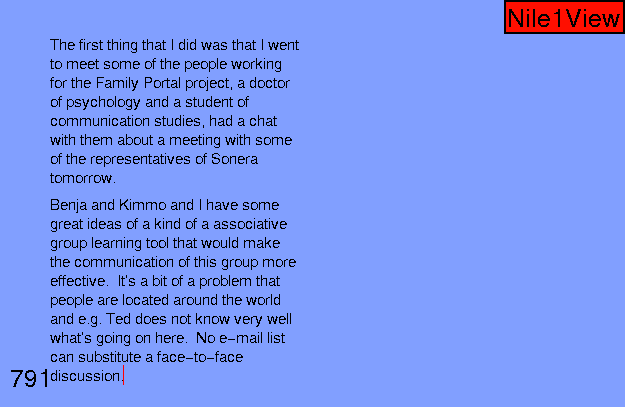
ENTER. Figure59 shows the Nile Window after typing
some text.
An example. You would like to change the fourth sentence of the example text so that
"a student of communication studies" would appear before "a doctor of psychology".
To achieve this is, you would have to do the following things:
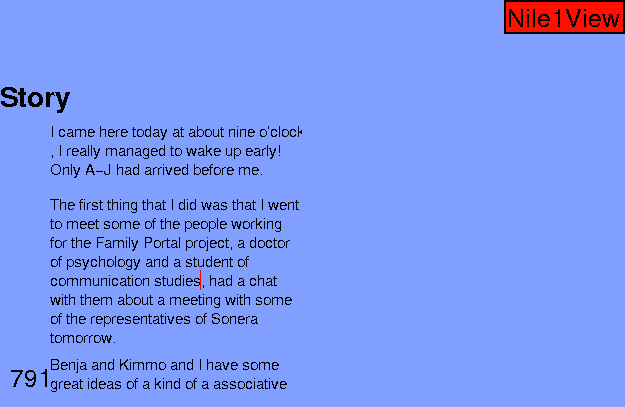
The first part of the task is easy to do with the mouse: just click on the place,
where you want the insertion cursor to be moved. (See Figure60,
which represents the situation after the move.)
You can also move the insertion cursor by using the arrow keys. Yet, before trying to move
the writing cursor with the arrow keys, you should learn to understand the
three modes of writing, which help you to move the writing cursor with the arrow
keys faster. You can also use the modes for activating parts of text (which is
currently done only by using the keyboard) in a more effective way.
The three modes are the character mode, the word mode and the sentence mode.
You can change the modes by pressing the TAB key. When you
first start using Nile, you are in the character mode. When you press the TAB key,
the mode is changed into the word mode. Pressing the TAB key after this, takes you
to the sentence mode. If you press the TAB once again, you're back in the
character mode.
If you want to activate words, use the word mode.
If you want to activate sentences, use the sentence mode. In our example case,
the use of the word mode is the best solution, because the phrase "a student of
communications studies" consists of many words.
Thus, to activate characters/words/sentences (depending in which mode you are),
use the arrow keys. If you want to activate more than one character/word/sentence/,
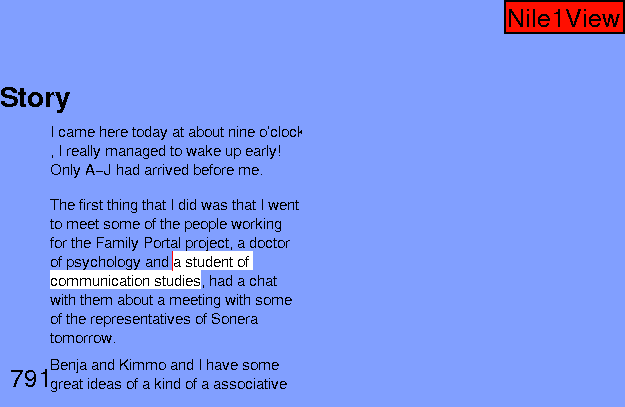
keep the SHIFT key down while activating. Figure61
shows "a student of communication studies" activated by pressing the SHIFT key and the
left arrow key five times. After this, you can move the activated phrase by pressing
ALT and an arrow key indicating the direction to which you want the text to be moved.
In order to move "a student of communication studies" to its intented place you would have
to keep the ALT key down and press the left arrow key until you'd see the text in the right
place. (Note. In our current example you would also have to move the word "and".)
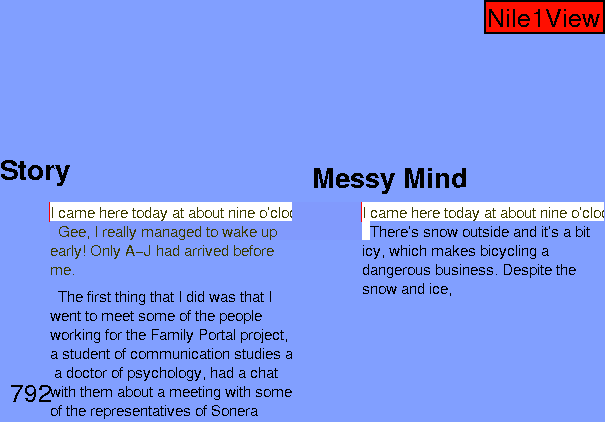
The writer of our example story now decides to make an improved version of her
story. To start another version, she clicks on the right side of the Nile window, writes
a new, improved title for the story, a totally new first sentence and a beginning
for the second sentence. (See Figure61.) After this, the
writer of the new version decides that the first sentence of the first version is usable and
wants to make a transclusion.
To make a transclusion the writer activates the sentence in question, clicks with the mouse
on the place where she wants the transclusion to be made. In our example case the writer
clicks after the ','. The key binding for a transclusion, then, is
CTRL+T. Nevertheless, because of a bug, the result is not quite
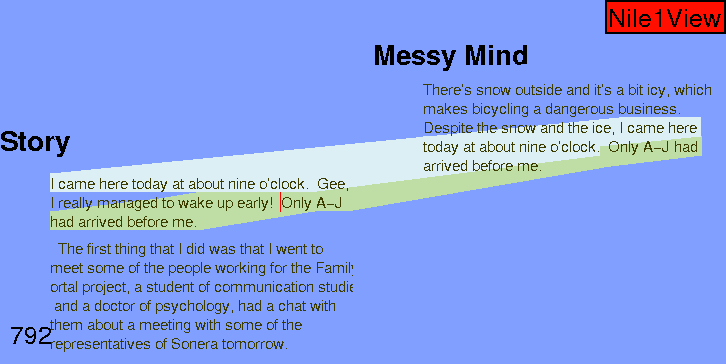
what the writer wanted. As Figure62 demonstrates,
the transclusion did not end up in the right place. (The bug WILL be fixed.) So, all
the writer can do, is to move the sentence to the right place using the method introduced in
. The text after the move (and another transclusion) is seen in
Figure63. The use of colours demonstrates the parts
of the texts that are the same. (This is likely to change, because the borderlines
of the transclusions are a bit difficult to see.)
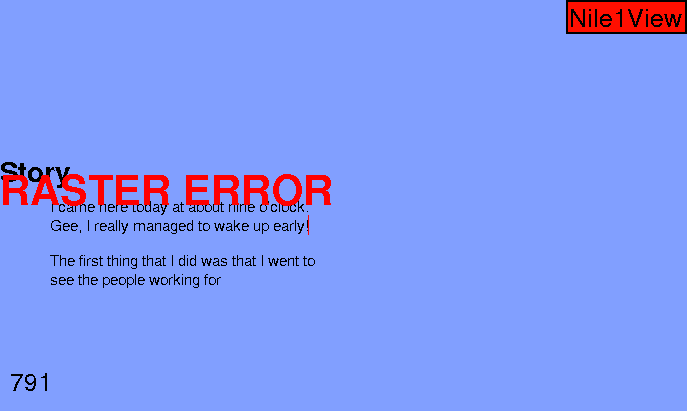
The writer of this document has been testing Nile for a while, but all the bugs are not yet fixed.
RASTER ERROR occurs frequently. Figure64 shows
the Nile Window after a bug.
To get back where you started from activate one of the GZZ-windows, press ESC
and move the green cursor and the blue cursor on the empty cells that you have
created for this purpose. (See ) Now you can return to the Nile window. (This
works often, NOT always.)
When you've had enough, press q. If you
want to continue working with the same space next time, use the same
cellscrollfile when starting.
#include "../keybindings.wml"
Choose one of the following depending on which cursor you want to
use